¶ Send Print License to the Workbench
Once you have published your recipe, you can print it using the DIS Workbench.
To send a print license to the DIS Workbench, follow the steps below.
¶ Prerequisites
- You must have Orders > Create permission. Ask your account manager if you have been given the correct permissions.
¶ Add a New Print License
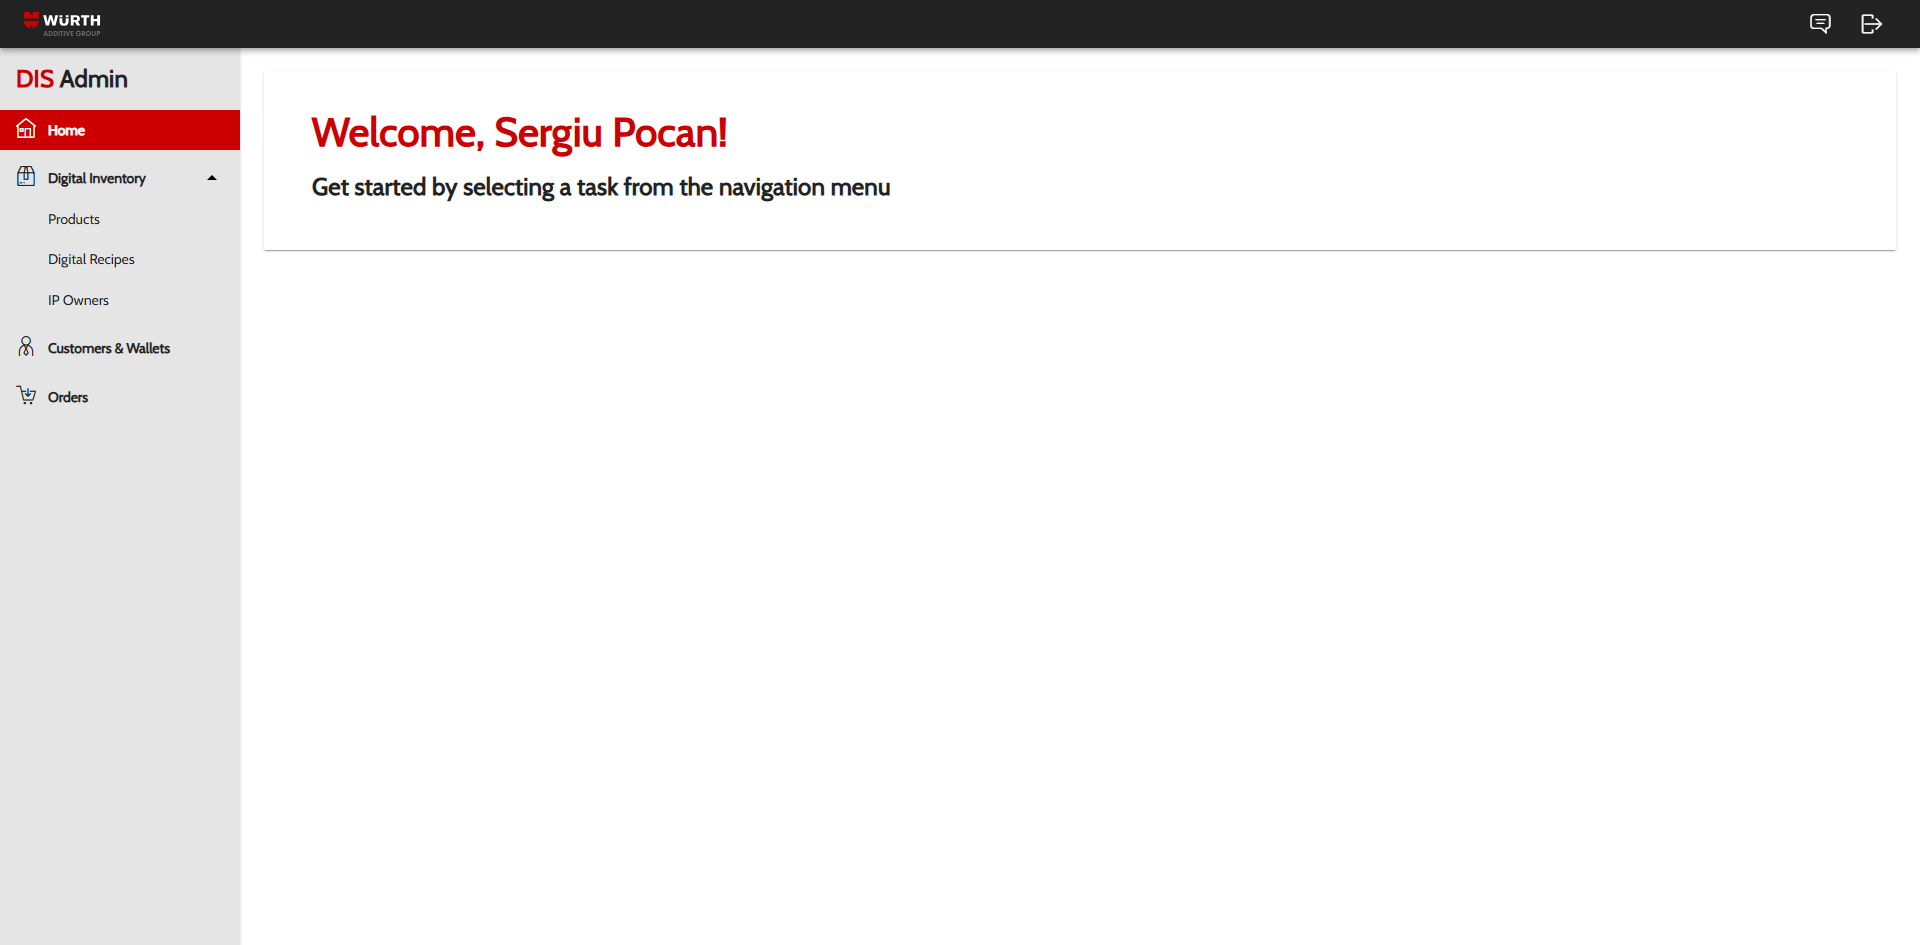
- Log in to the DIS Admin Portal.
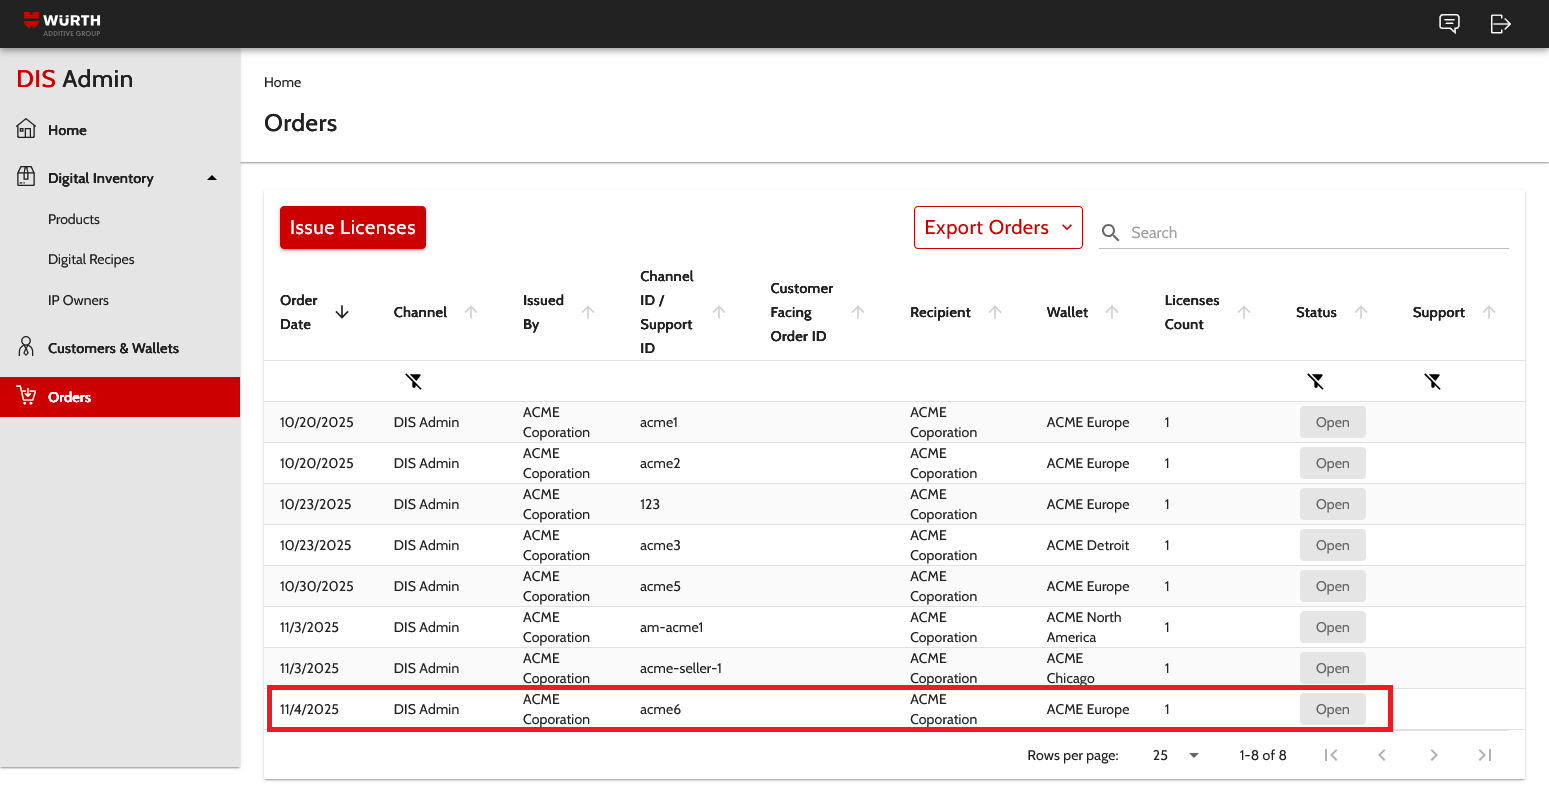
- Navigate to the Orders menu
- This is where you can see all the print licenses you have access to.
- If you don't see the Orders menu, see the Troubleshooting section below.
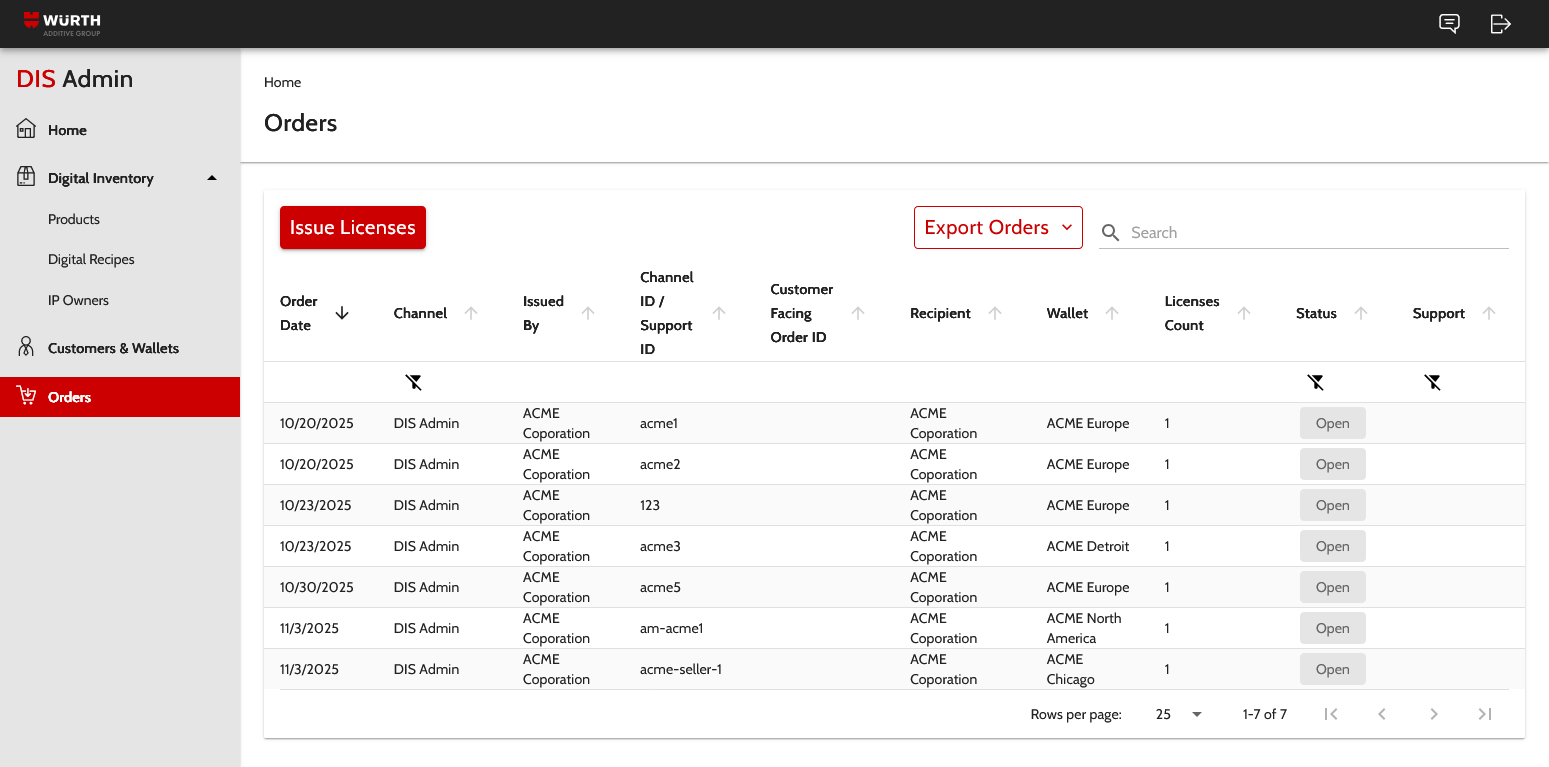
- Press Issue Licenses.
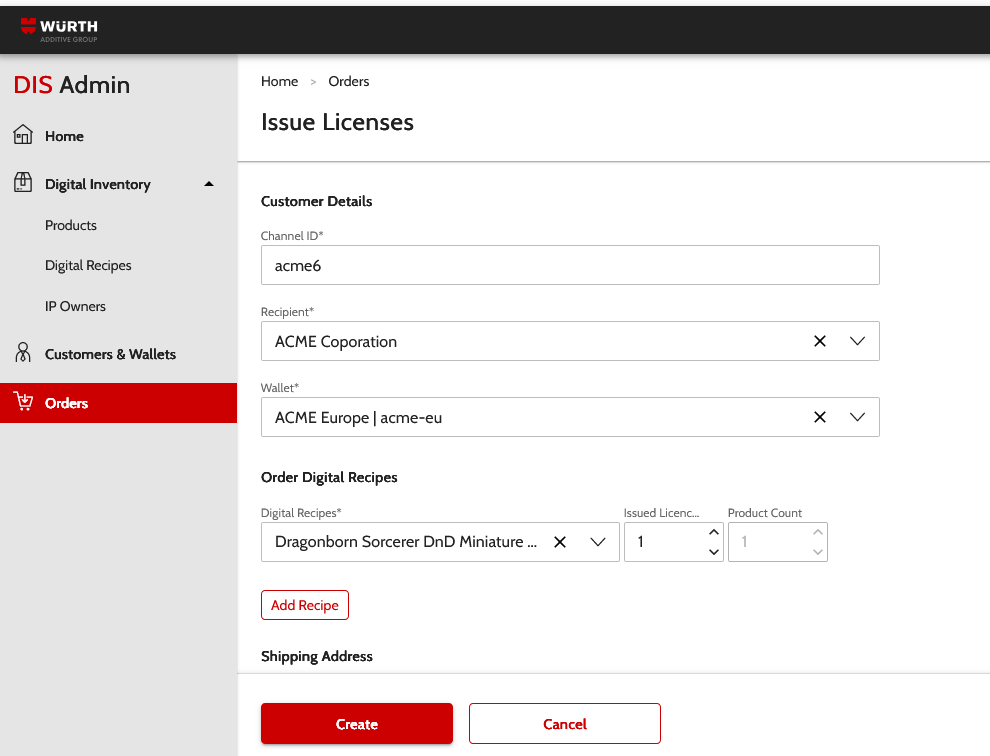
- Specify the Channel ID - a unique identifier you associate with the print license.
- Select the Recipient customer who will receive the print license.
- This is normally your company (unless you are assigned to multiple companies).
- Select the Wallet - where the print license will be sent.
- You'll be able to select from the available wallets.
- Add one or more Digital Recipes you wish to print.
- To add a recipe, you can select from the recipes that you have access to. You can also search for the recipe.
- If you don't see any recipes, read the Troubleshooting section below
- You can add additional recipes by pressing the Add Recipe button.
- To add a recipe, you can select from the recipes that you have access to. You can also search for the recipe.
- Fill in the shipping address for the print license - this can be left empty.
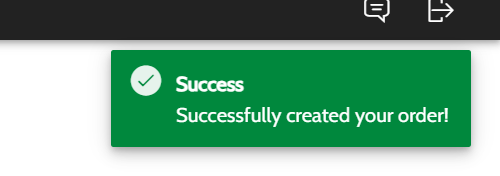
- Press Create to send the print license.
- You will see a notification in the top-right corner of the application when the print license (order) is created.
- Press Cancel to return to the list of print licenses.
- You will see the print license you just created in the list of print licenses.
¶ Access the Print License
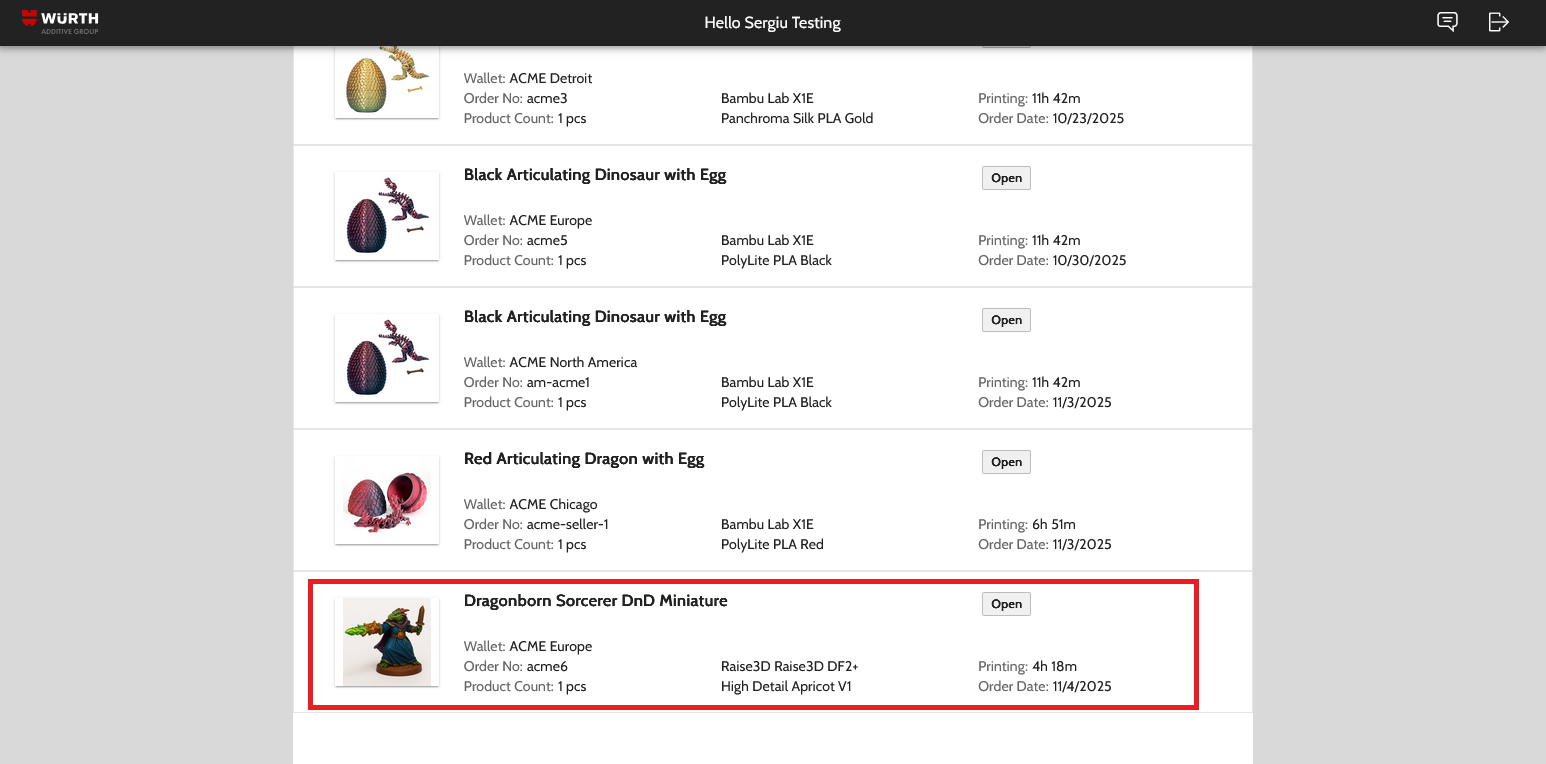
You can now log in to the DIS Workbench to see the print license.
Important: You will only see the print license that you created if it was sent to a wallet that you have been assigned to.
If you don't see the license, although you think you should see the Troubleshooting section below.
¶ Troubleshooting
¶ Orders Menu is Not Displayed
If you don't see the Orders menu, check that you have been granted the necessary privileges:
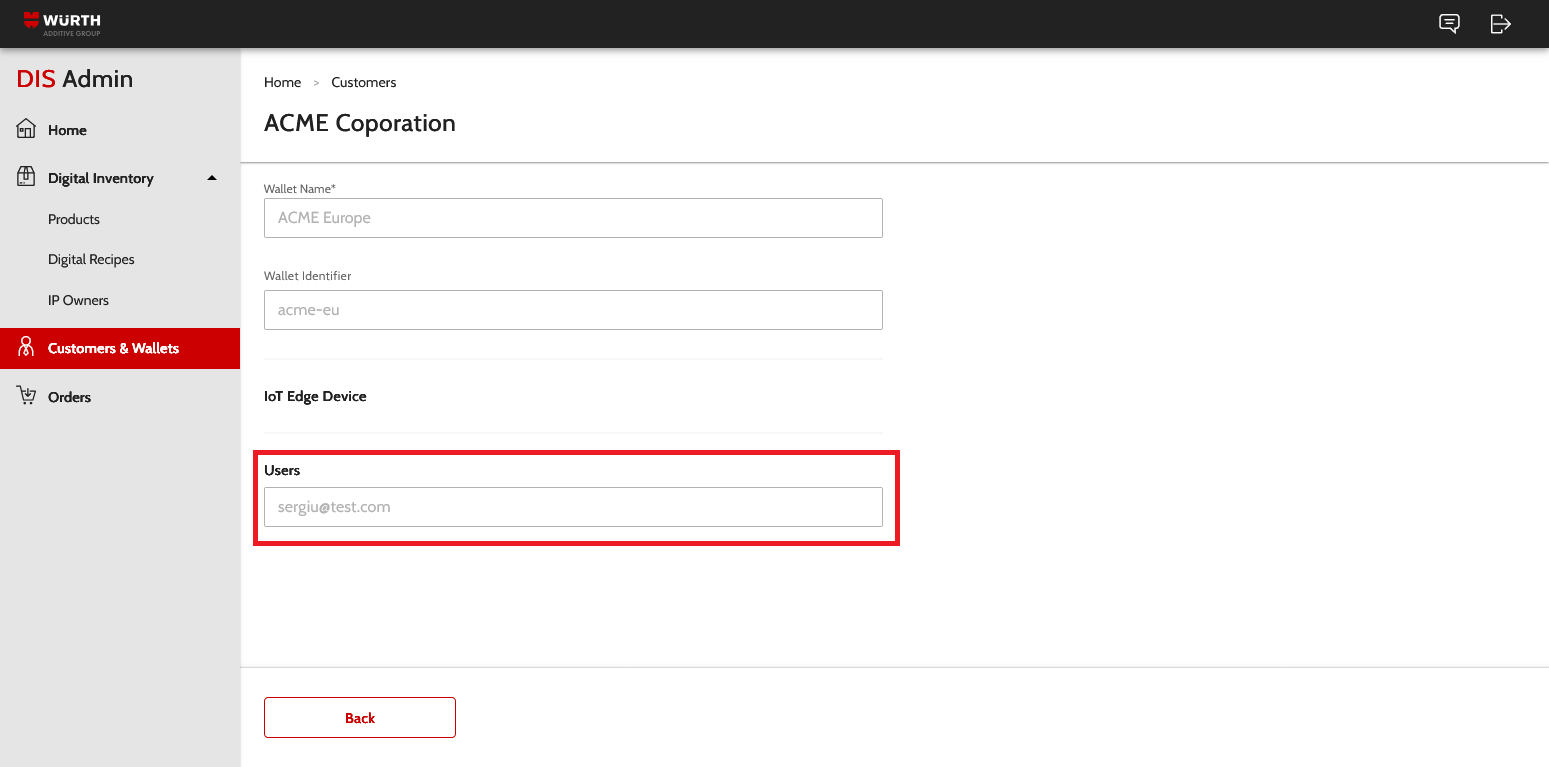
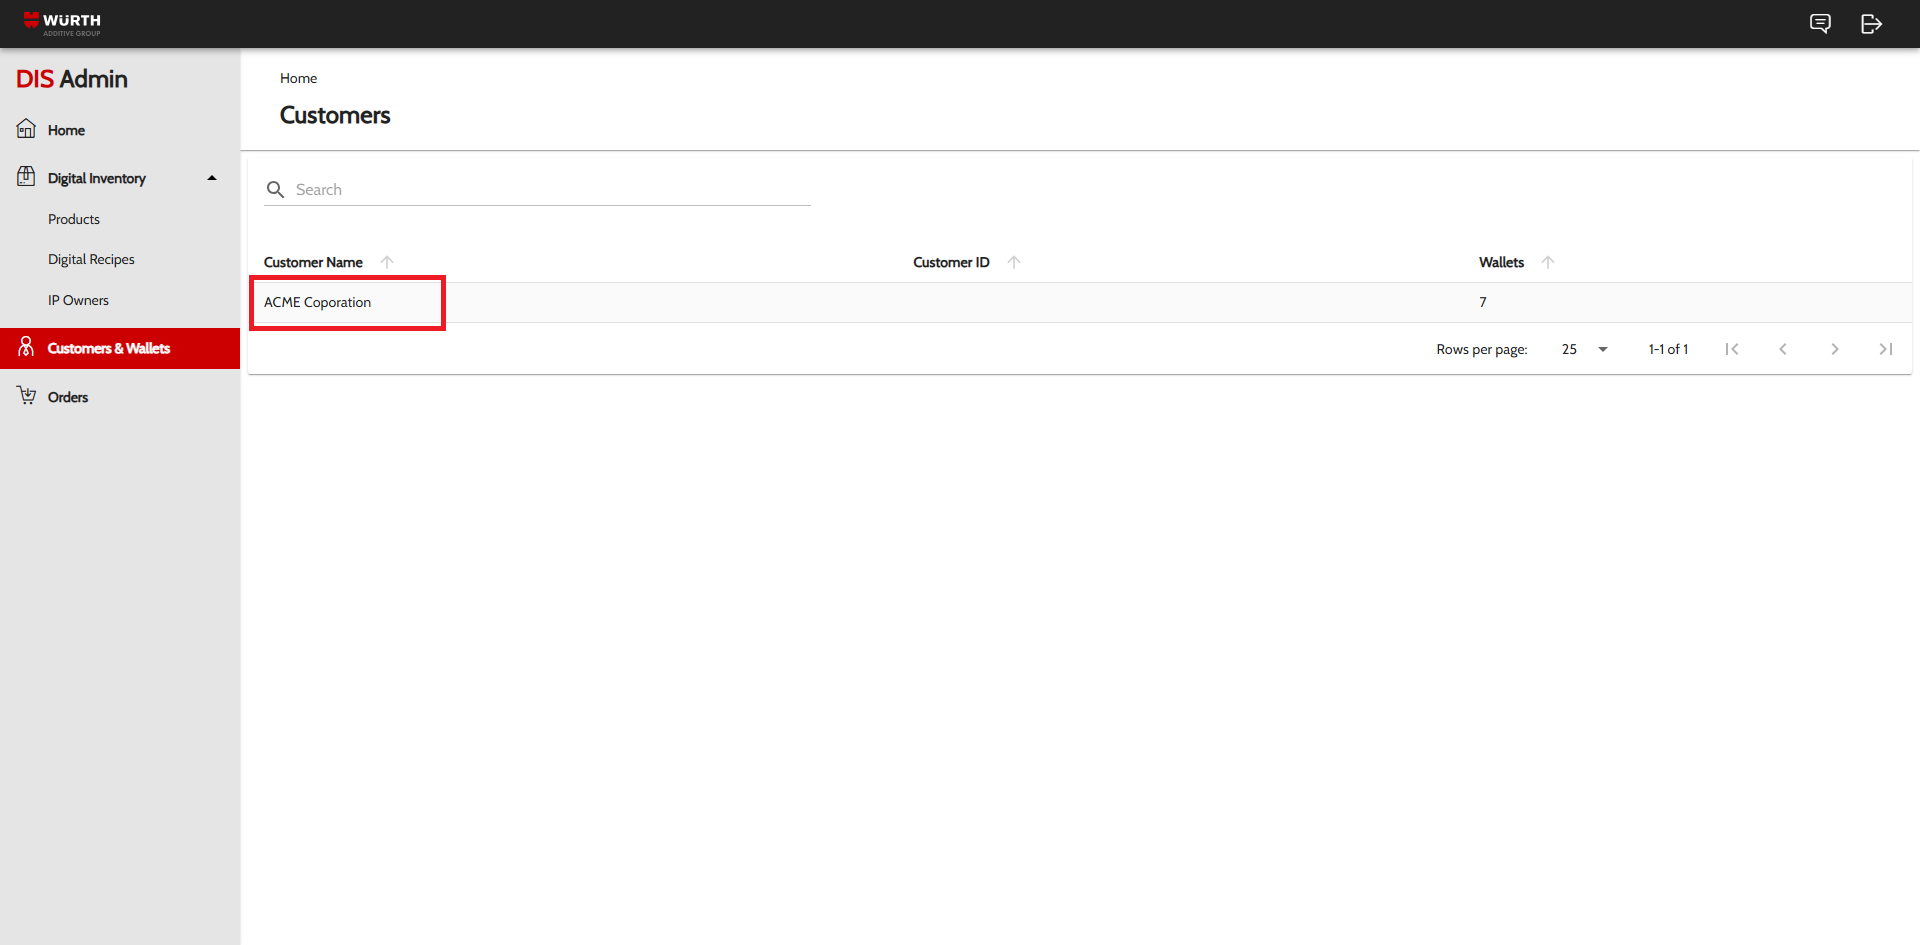
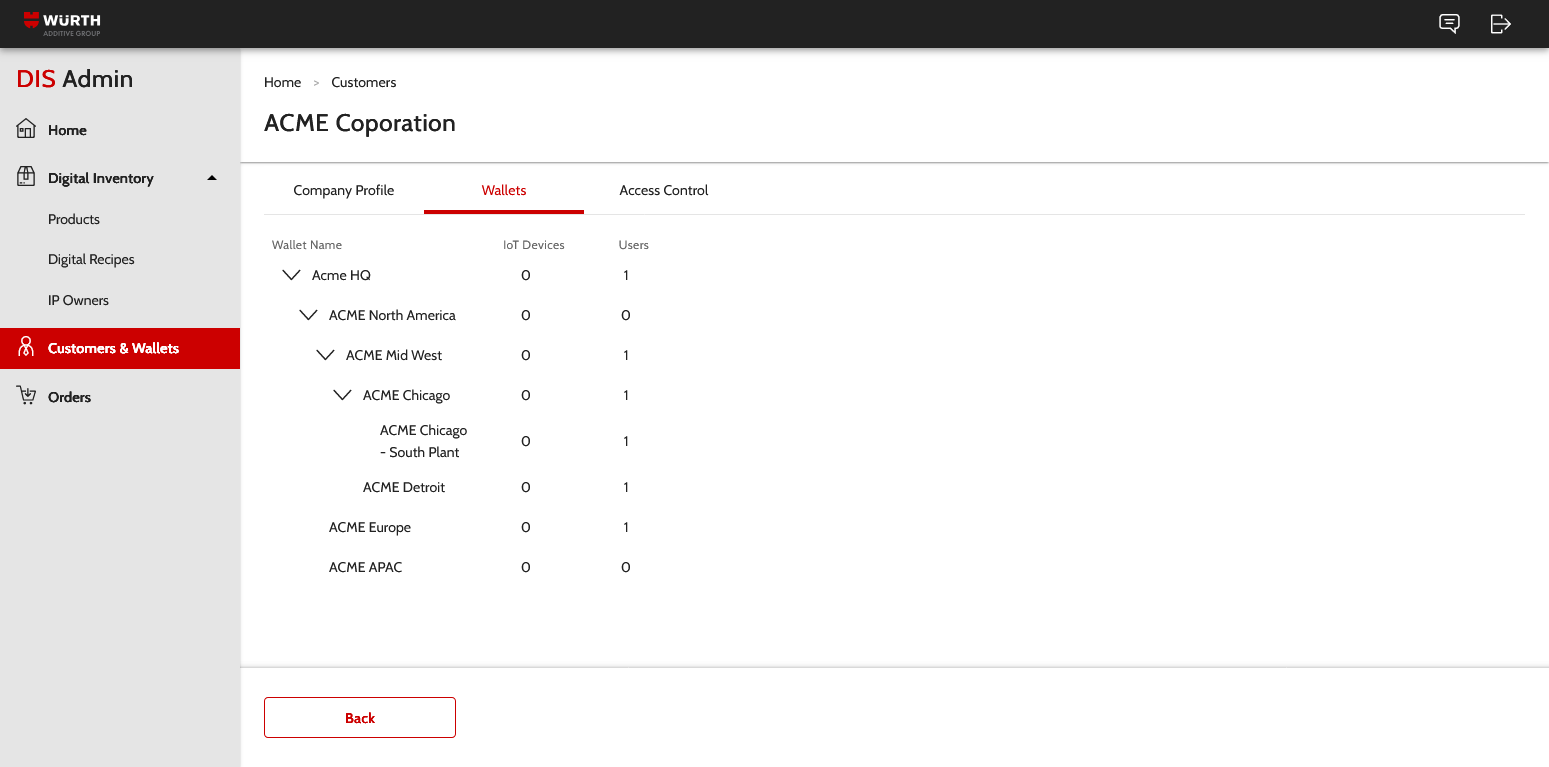
- Navigate to Customers & Wallets.
- If you don't see the Customers & Wallets menu, see the section “No Read Access for Customers” below
- You should see your company name.
- Press the company name.
- You will see the company wallets.
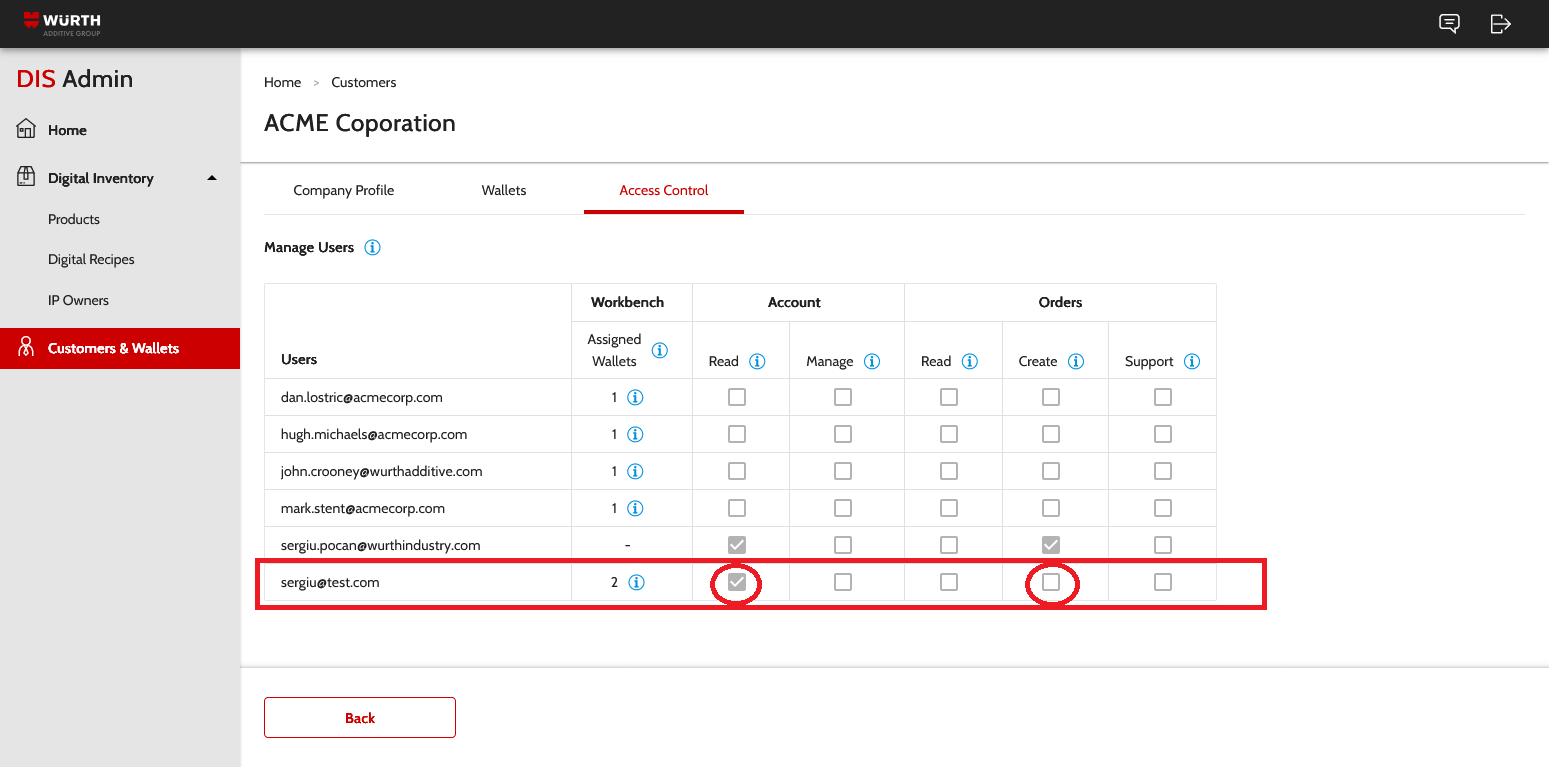
- Navigate to Access Control.
- Check that the Account > Read and Orders > Create checkboxes are ticked for your email address.
- If they are not ticked, reach out to your account manager to grant you the correct permissions.
¶ No Read Access for Customers
If you don't see the Customers & Wallets side menu, it means you don't have the Account > Read privilege.

Reach out to your account manager to activate the Account > Read option for your account.
Additionally, if you want to issue licenses, you will also need the Orders > Create check box to be ticked (see section above)
¶ No Digital Recipes Available
If you don't see any digital recipes in the list of digital recipes, there could be several reasons:
- You are not added as a user to the IP Owner entity.
- The IP owner you have been assigned to hasn't published any digital recipes.
¶ You are not assigned as a user to an IP Owner
If you are not assigned to an IP Owner, you will not see the Digital Inventory entry in the side menu.
- Contact your account manager to add you to the IP owner.

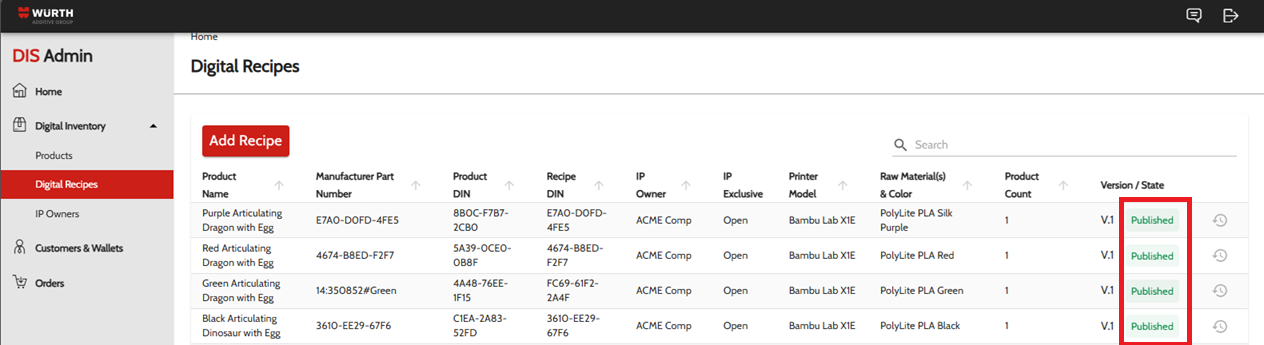
¶ No Digital Recipes Published
If you do have access to the Digital Inventory menu, make sure that there are products with digital recipes with the state Published
¶ Print Doesn't Appear In Workbench
If you were expecting to see the print license you just created, check the following:
- The print license was created for the expected wallet.
- You are assigned to that wallet.
¶ Check The Wallet on the Print
To check that you have sent the print to the correct wallet, follow the steps below:
- Log in to the DIS Admin.
- Navigate to Orders.
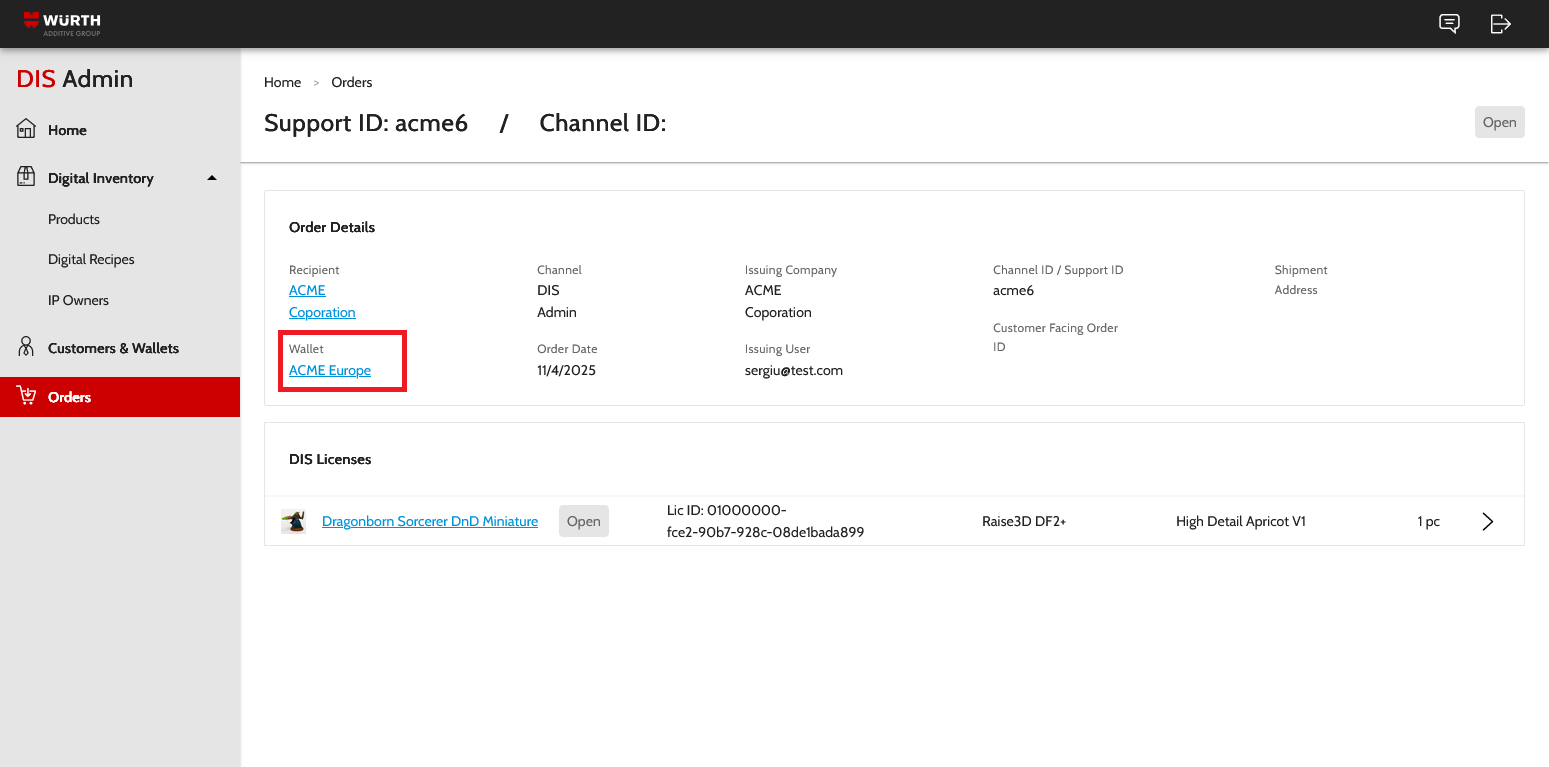
- Press the print license you are trying to access.
- You will see the customer (as the Recipient) and the Wallet to which the print has been sent.
- If it's not the correct wallet, you will need to create another print license for the correct wallet.
- The application doesn't currently allow you to change the wallet or to remove the print license. Contact your account manager for assistance in removing the incorrect print license.
¶ Check Your Wallet Assignment
If the wallet is correct, make sure that you are assigned to that wallet.
To check if you are assigned to a specific wallet, follow the steps below:
- Navigate to Customers & Wallets
- Select your company name.
- Navigate to the Wallets tab.
- Press on the Wallet you used for the print license.
- Check if your email address is assigned to that wallet.
- If it's not there, ask your account manager to add your address.